


If you’ve ever dreamed of building a professional-looking website without touching a single line of code, Divi Builder might just be your new best friend. This powerful drag-and-drop page builder is designed to help beginners create stunning web pages quickly, even if they’ve never worked with WordPress before. Learning how to use Divi Builder for beginners is like learning to drive an automatic car — you don’t need to know how the engine works; you just need to know which buttons to press.
One of the best things about Divi Builder is its visual editing interface. You can see your changes in real time, so there’s no guessing or flipping between preview and editor tabs. You move things around, tweak colors, adjust fonts, and instantly see how it looks on your site.
Many beginners love Divi Builder because it comes with hundreds of pre-made layouts. Think of these as ready-made templates that you can customize for your own needs. Whether you’re building a blog, an online store, or a portfolio, there’s likely a template that’s 80% of the work done for you. All you need to do is fill in the details.
In this guide, we’ll break down how to use Divi Builder for beginners step-by-step — from installing it, understanding the interface, and creating your first page, to mastering its modules and visual editor. By the end, you’ll have the skills and confidence to create a website that looks like it was designed by a pro.
What is Divi Builder?
Divi Builder is a WordPress page builder plugin created by Elegant Themes. It works with any WordPress theme, but it’s especially powerful when paired with the Divi Theme. This plugin lets you create complex layouts with ease using a drag-and-drop interface instead of dealing with code.
When learning how to use Divi Builder for beginners, it’s important to know that it’s made up of sections, rows, and modules — the building blocks of your pages.
- Sections are the big containers for your content.
- Rows go inside sections and control the layout.
- Modules are the actual content elements, like text, images, buttons, videos, or forms.
Another big advantage of Divi Builder is its responsive design capabilities. Your site will look great whether someone’s viewing it on a desktop, tablet, or smartphone — and you can fine-tune the layout for each device.
Why Beginners Love Using Divi Builder
When people first try to make a website, they often feel overwhelmed by choices and technical jargon. Divi Builder removes a lot of that stress. Here’s why it’s so beginner-friendly:
- No Coding Skills Required – You can create an entire website without touching HTML, CSS, or JavaScript.
- Real-Time Visual Editing – You see exactly how your page looks as you design it.
- Pre-Made Layouts – You don’t start from scratch; instead, you use beautiful templates and tweak them.
- All-in-One Solution – Divi Builder has modules for almost everything you need — from images and videos to contact forms and sliders.
- Drag-and-Drop Simplicity – You can rearrange content by simply clicking and dragging.
If you’re serious about learning how to use Divi Builder for beginners, you’ll quickly see why it’s considered one of the easiest page builders for newcomers.
Key Features That Make Divi Builder Stand Out
Divi Builder has a set of features that make it not only beginner-friendly but also powerful enough for professional web designers.
- Frontend Visual Builder – Edit pages directly on the frontend while seeing the changes live.
- Responsive Editing – Adjust how your site looks on mobile, tablet, and desktop.
- Reusable Layouts – Save your designs and use them again on other pages.
- Global Elements – Update one element and see changes applied everywhere it’s used.
- Custom CSS Control – For advanced users, you can still add custom CSS to fine-tune designs.
When learning how to use Divi Builder for beginners, you’ll appreciate how flexible it is — it’s simple when you need it to be, but has depth if you want to grow your skills.
Getting Started with Divi Builder
Before you can start creating beautiful pages, you need to install and activate Divi Builder. The process is straightforward:
- Purchase a License from Elegant Themes.
- Download the Plugin from your Elegant Themes account.
- Install it in WordPress by going to Plugins → Add New → Upload Plugin.
- Activate the Plugin and you’re ready to go.
Once activated, Divi Builder will be available for any page or post you create. You’ll see a button that says “Use Divi Builder.” Clicking it will open the Divi Builder interface, which is where the magic happens.
When learning how to use Divi Builder for beginners, I recommend starting with a simple test page first. This way, you can explore the features without worrying about messing up your real site.
Understanding the Divi Builder Interface
The Divi Builder interface might look busy at first, but it’s actually very organized once you know where things are. Here’s a breakdown:
- Top Toolbar – Contains options to save, undo, redo, and preview your page.
- Sidebar Panel – Lets you edit the settings of sections, rows, and modules.
- Main Canvas – Where you drag and drop elements and visually build your page.
One of the best tips for how to use Divi Builder for beginners is to hover over each icon and see what it does. The builder is filled with little tooltips and labels that guide you through every step.
Creating Your First Page with Divi Builder
Once you’ve installed Divi Builder, it’s time to create your first page. This is where you’ll see just how beginner-friendly the builder really is.
- Create a New Page – In your WordPress dashboard, go to Pages → Add New.
- Click “Use Divi Builder” – This launches the builder interface.
- Choose How to Start – You’ll be given three options:
- Build From Scratch
- Choose a Premade Layout
- Clone an Existing Page
- Build From Scratch
For beginners, I recommend starting with Choose a Premade Layout. Divi has hundreds of professionally designed templates for different niches — restaurants, fitness, business, portfolios, and more.
Once you pick a layout, you can replace the placeholder text and images with your own. The drag-and-drop system makes it simple — just click on the element you want to edit, type your text, or upload your image.
When learning how to use Divi Builder for beginners, you’ll find that it’s often faster to start with a template than from scratch. Templates give you a professional structure while still allowing customization.
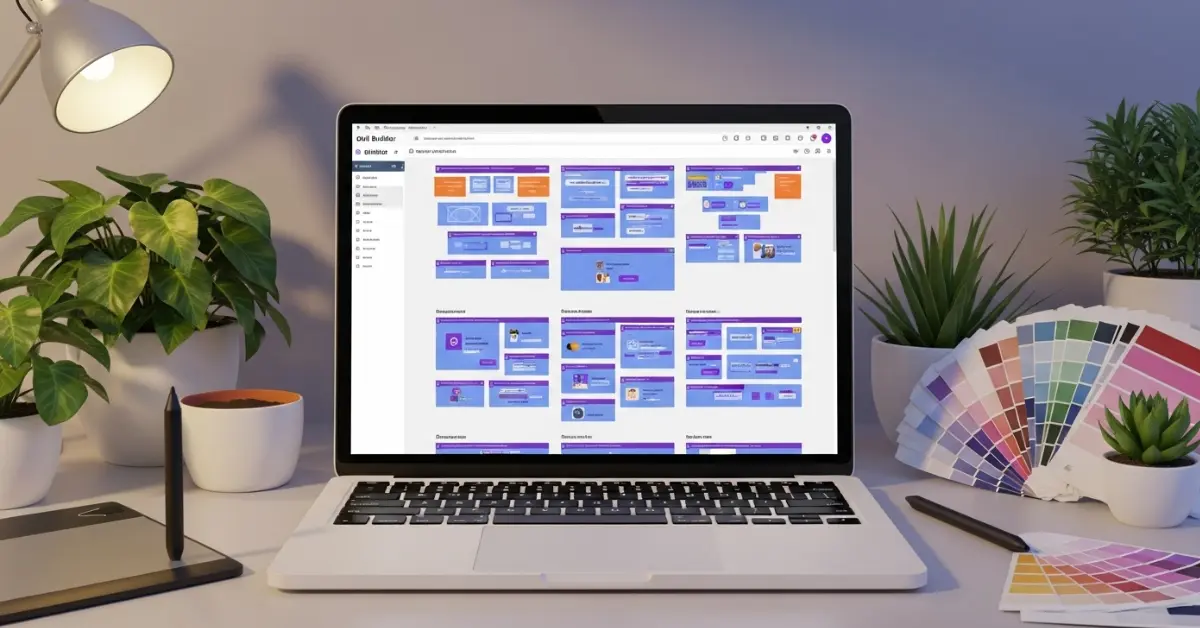
Using Pre-Made Layouts in Divi Builder
One of Divi’s biggest time-saving features is its library of pre-made layouts. These layouts are not just single pages; many come as complete website packs with multiple pages already designed for you.
To use one:
- Click “Choose Premade Layout” when starting your page.
- Browse through the available packs and pick one that fits your project.
- Import the layout to your page.
- Start editing the text, images, and colors.
Beginners often love this approach because the heavy lifting — spacing, font pairing, and color harmony — is already done. You just make it yours by swapping content.
Customizing Your Page Step-by-Step
Let’s break down how to personalize your first page:
- Edit Text – Click directly on the text you want to change. You can adjust font style, size, and alignment.
- Replace Images – Click on an image module, upload your photo, and adjust cropping if needed.
- Change Colors – Use the color picker to match your brand colors.
- Adjust Layouts – Drag and drop sections or rows to change the page’s structure.
- Preview on Mobile – Click the mobile icon to see how it looks on smaller screens.
When learning how to use Divi Builder for beginners, it’s smart to make small changes first. That way, you don’t overwhelm yourself or accidentally break the layout.
Mastering Divi Modules and Sections
In Divi Builder, modules are your content blocks. These include:
- Text
- Image
- Video
- Button
- Contact Form
- Slider
- Gallery
Sections are the largest containers that hold rows, and rows hold modules. Think of it like nesting boxes:
- Section → Row → Module.
To add a new section:
- Click the blue “+” button to add a section.
- Choose between Regular, Specialty, or Fullwidth.
- Add rows and then fill them with modules.
Once you understand this structure, you’ve cracked the code for how to use Divi Builder for beginners. Everything in Divi follows this hierarchy, so once you learn it, building becomes much easier.
Styling and Formatting Tips for Beginners
Even though Divi Builder gives you professional layouts, your site will look even better with a few design principles:
- Keep It Simple – Don’t overload a page with too many colors, fonts, or animations.
- Use Consistent Spacing – Align margins and padding so everything feels balanced.
- Match Your Brand Colors – Use a color palette that fits your business or personal style.
- Readable Fonts – Choose fonts that are easy to read and don’t use too many different styles.
- Test on Multiple Devices – Always preview your design on desktop, tablet, and mobile.
Following these tips ensures that your site looks clean and professional, even if you’re brand new to web design.
Working with Divi Builder’s Visual Editor
The Visual Editor is where Divi truly shines. It’s like editing your site in a live preview mode — what you see is exactly what your visitors will see.
To use it:
- Enable the Visual Builder on any page.
- Click directly on text, images, or modules to edit.
- Drag elements around to rearrange them.
Beginners find this interface less intimidating because there’s no separate “edit” screen — you’re editing right on the page. This makes how to use Divi Builder for beginners a much more intuitive process than traditional WordPress editing.
How to Use the Drag-and-Drop Functionality
The drag-and-drop feature in Divi Builder is a game changer for beginners. Instead of dealing with code or complicated menus, you simply click an element and move it wherever you want on the page.
Here’s how it works:
- Hover over the element you want to move.
- Click and hold the move handle (a small icon with arrows).
- Drag it to the desired location and release.
You can rearrange text, images, buttons, and even entire sections. The builder automatically adjusts spacing, so you don’t have to worry about breaking the layout.
One tip for how to use Divi Builder for beginners is to use grid guides. These help you align elements evenly, which makes your design look clean and professional.
Real-Time Editing with Divi Builder
One of Divi Builder’s most loved features is real-time editing. Instead of editing blindly and clicking “Preview,” you make changes and immediately see them reflected on your live page.
For example, if you change the color of a button from blue to red, the change appears instantly. This makes it much easier for beginners to experiment with design without the fear of messing up — because you can always undo or redo actions instantly.
Another bonus for learning how to use Divi Builder for beginners is the history panel. It logs every action you take, so you can step back several changes if you don’t like how something turned out.
Tips for Making Your Pages Look Professional
While Divi makes design easy, here are some beginner-friendly tricks to make your site look polished:
- Stick to a Consistent Layout – Don’t randomly change section styles from one page to another.
- Limit Color Choices – Use no more than 3–4 main colors.
- Choose Quality Images – High-resolution, properly cropped photos instantly upgrade your design.
- Use White Space – Don’t cram elements together; let them breathe.
- Balance Text and Visuals – Too much text can be overwhelming; too many visuals can be distracting.
By following these rules, you’ll master how to use Divi Builder for beginners in a way that produces clean, modern designs.
Customizing Your Website’s Design with Divi Builder
Customization is where Divi becomes addictive. You can change almost every aspect of your site without touching code.
- Colors – Change text, background, and border colors to match your branding.
- Fonts – Choose from hundreds of Google Fonts and adjust size, weight, and letter spacing.
- Backgrounds – Add solid colors, gradients, images, or even videos.
- Borders and Shadows – Give sections and images a unique style.
One powerful tip for how to use Divi Builder for beginners is to save custom styles. If you create a button style you love, save it as a global module so you can reuse it across your site without recreating it every time.
How to Save and Reuse Custom Layouts
As you create pages, you might design a layout you want to use again. Divi makes this easy:
- Open the page in the Divi Builder.
- Click the “Save to Library” option.
- Name your layout and choose if it should be global (changes everywhere when updated).
This feature is especially useful for headers, footers, and recurring sections like testimonials or call-to-action blocks. When learning how to use Divi Builder for beginners, saving layouts will save you hours of repetitive work.
Adding Advanced Features in Divi Builder
Once you’ve mastered the basics, it’s time to explore some of Divi’s advanced modules. These can take your site from simple to stunning without requiring any coding knowledge.
- Animations – Add fade-ins, slide-ins, or zoom effects to make elements pop.
- Forms – Use the contact form module to create lead forms or surveys.
- Sliders – Display multiple images or messages in a sliding format.
- Galleries – Showcase images in a grid or masonry style.
- Video Backgrounds – Add dynamic movement to your sections with looping videos.
For beginners, the trick is to use these features sparingly. Too much animation or too many sliders can slow down your site and distract visitors. The goal when learning how to use Divi Builder for beginners is to enhance the design, not overwhelm it.
Making Your Site Mobile-Friendly with Divi Builder
A huge advantage of Divi is its built-in responsive design tools. You can customize how your site looks on desktop, tablet, and mobile — all from the same interface.
Here’s how:
- In any module’s settings, click the device icons to switch between views.
- Adjust font sizes, spacing, or even hide certain elements on smaller screens.
- Preview your changes instantly in the Visual Builder.
For how to use Divi Builder for beginners, always check your mobile view before publishing. More than half of all website traffic comes from mobile devices, so a mobile-friendly layout is non-negotiable.
Common Mistakes Beginners Make in Divi Builder
When starting out, it’s easy to make design choices that hurt your site’s usability. Here are a few pitfalls to avoid:
- Overcomplicating Layouts – Stick to simple, clean structures.
- Using Too Many Fonts – One or two font families are enough.
- Neglecting Mobile Optimization – Always preview your design on multiple devices.
- Ignoring Page Speed – Avoid oversized images and heavy animations.
- Not Saving Work Often – While Divi has autosave, it’s still best to save manually.
Avoiding these mistakes will help you master how to use Divi Builder for beginners more quickly and produce a better end result.
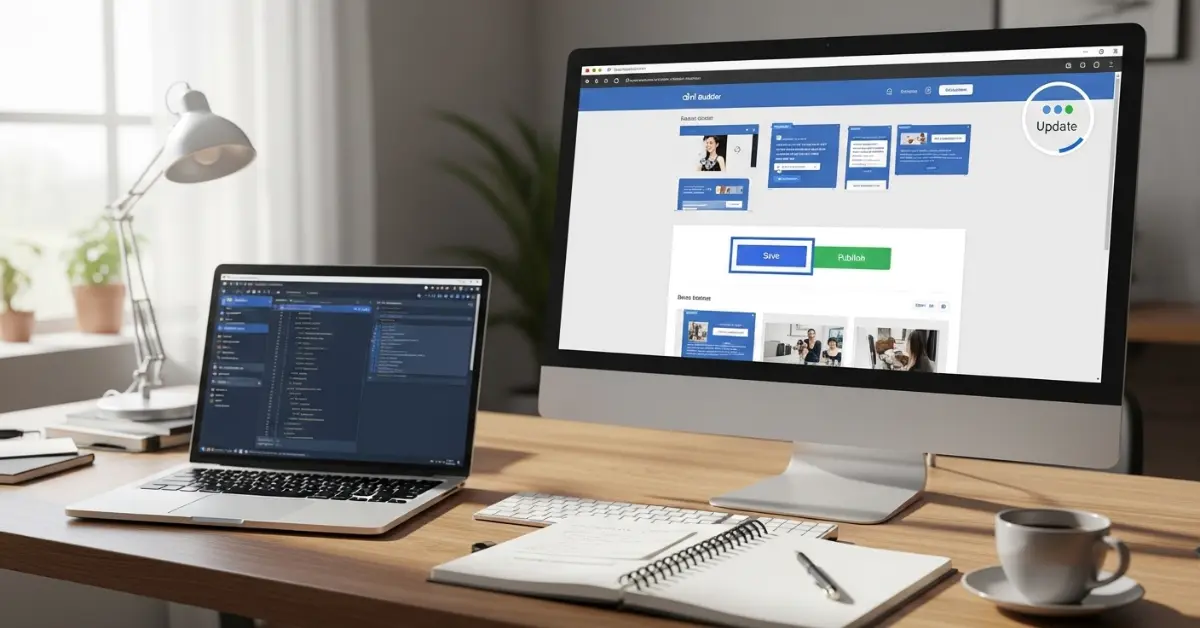
Saving, Publishing, and Updating Your Work in Divi Builder
After you’ve created and customized your page, you’ll want to save it properly:
- Save Draft – Good for ongoing projects you’re not ready to publish.
- Preview Changes – Check how your page looks to visitors.
- Publish – Make your page live for the world to see.
Updating is just as easy. Open the page in the Divi Builder, make your edits, and click “Update.” If you’ve used global elements, changes will apply across all pages instantly.
Tips and Tricks for Beginners to Master Divi Builder
Before we wrap up, here are some pro tips:
- Learn Keyboard Shortcuts – Speeds up editing.
- Use Global Modules – Keeps design consistent.
- Duplicate Sections – Saves time when you want similar layouts.
- Lock Important Modules – Prevents accidental edits.
- Experiment – The more you play around, the faster you’ll learn.
These small habits will make learning how to use Divi Builder for beginners not just easier, but enjoyable.
Finally – Why Divi Builder is Perfect for Beginners
If you’ve made it this far, you now have a solid grasp of how to use Divi Builder for beginners. From installing the plugin and exploring the Visual Builder, to customizing layouts and adding advanced features, Divi puts powerful design tools in your hands — without requiring you to write a single line of code.
For beginners, the real magic of Divi lies in its combination of simplicity and flexibility. You can start with pre-made templates for quick results, then gradually experiment with more advanced features as your confidence grows. Whether you’re building a personal blog, an online portfolio, or a full-fledged business site, Divi Builder gives you everything you need to make it look professional from day one.
FAQs About Using Divi Builder for Beginners
Yes. The drag-and-drop interface, pre-made layouts, and real-time editing make it one of the most beginner-friendly WordPress builders available.
Absolutely. You can create a fully functional website without writing a single line of code.
Divi Builder is part of the Elegant Themes membership, which includes the Divi Theme and other tools. Pricing varies depending on whether you choose annual or lifetime access.
Yes. Divi generates clean code and integrates well with popular SEO plugins like Yoast SEO.
Divi offers one of the most powerful visual editors and the largest library of ready-to-use layouts, making it more beginner-friendly than many competitors.